
Interactive Brokers(IB) (referral link) is a popular broker, operating in several counties worldwide, usually under local national names. Their trading platform is the same everywhere, it's the Trader Workstation or TWS. For novice users, it may be somewhat intimidating at first glance, but once you get a good understanding, you'll see it has many powerful features to offer.
We have learned that disciplined trading is the only way to survive in this business. The best way to adhere to your own strict trading rules is to automate things. Let your orders take care of your trading, not your brain because the human brain usually fails in (short-term) trading. To achieve this, we need an extensive set of order types. TWS has just that, so let's get into it.
Suppose, we want to buy a position (go long) on a small intray-day pullback. Then, once that position is filled, we want to protect ourselves from huge losses by having a stop-loss (always!). Another thing is, we want to take profit at a particular level when we think the trade has done good enough. But before it reaches that level of profit, we may want to reduce our risk by pulling up the stop-loss. And finally, we want to close the position before the weekend, if it isn't already closed.
Wouldn't it be great to do all that, without any manual interaction? Without allowing our ancient lizard brain to interfere with our trading plan and make self-destructive decisions? In the example below, I am buying the ES E-mini S&P 500 future (ESH1) and add all the extra orders.
We start by entering a basic buy limit order. There are several ways to do this, depending on your settings. For instance, click on the ask-price, in this example 3707.50. This creates a basic buy limit order in which I've set the price at 3700.00. Time-in-force (TIF) is set to GTC or good-till-canceled. Meaning, that the order will stay in place until it is manually canceled.
If you choose DAY, the order will be canceled at midnight. An interesting middle ground is the GTD (good-till-date). In that case, you also have to fill in a date and time when the order will be canceled. This prevents you, for example, from obtaining a position just before market close.
Order status is T (with the blue background, although your color setting may differ). This means, the order is not yet transmitted to IB and is still in preview.
![]()
Your column layout probably differs from mine. If you want, you can easily change the layout by going into the settings.
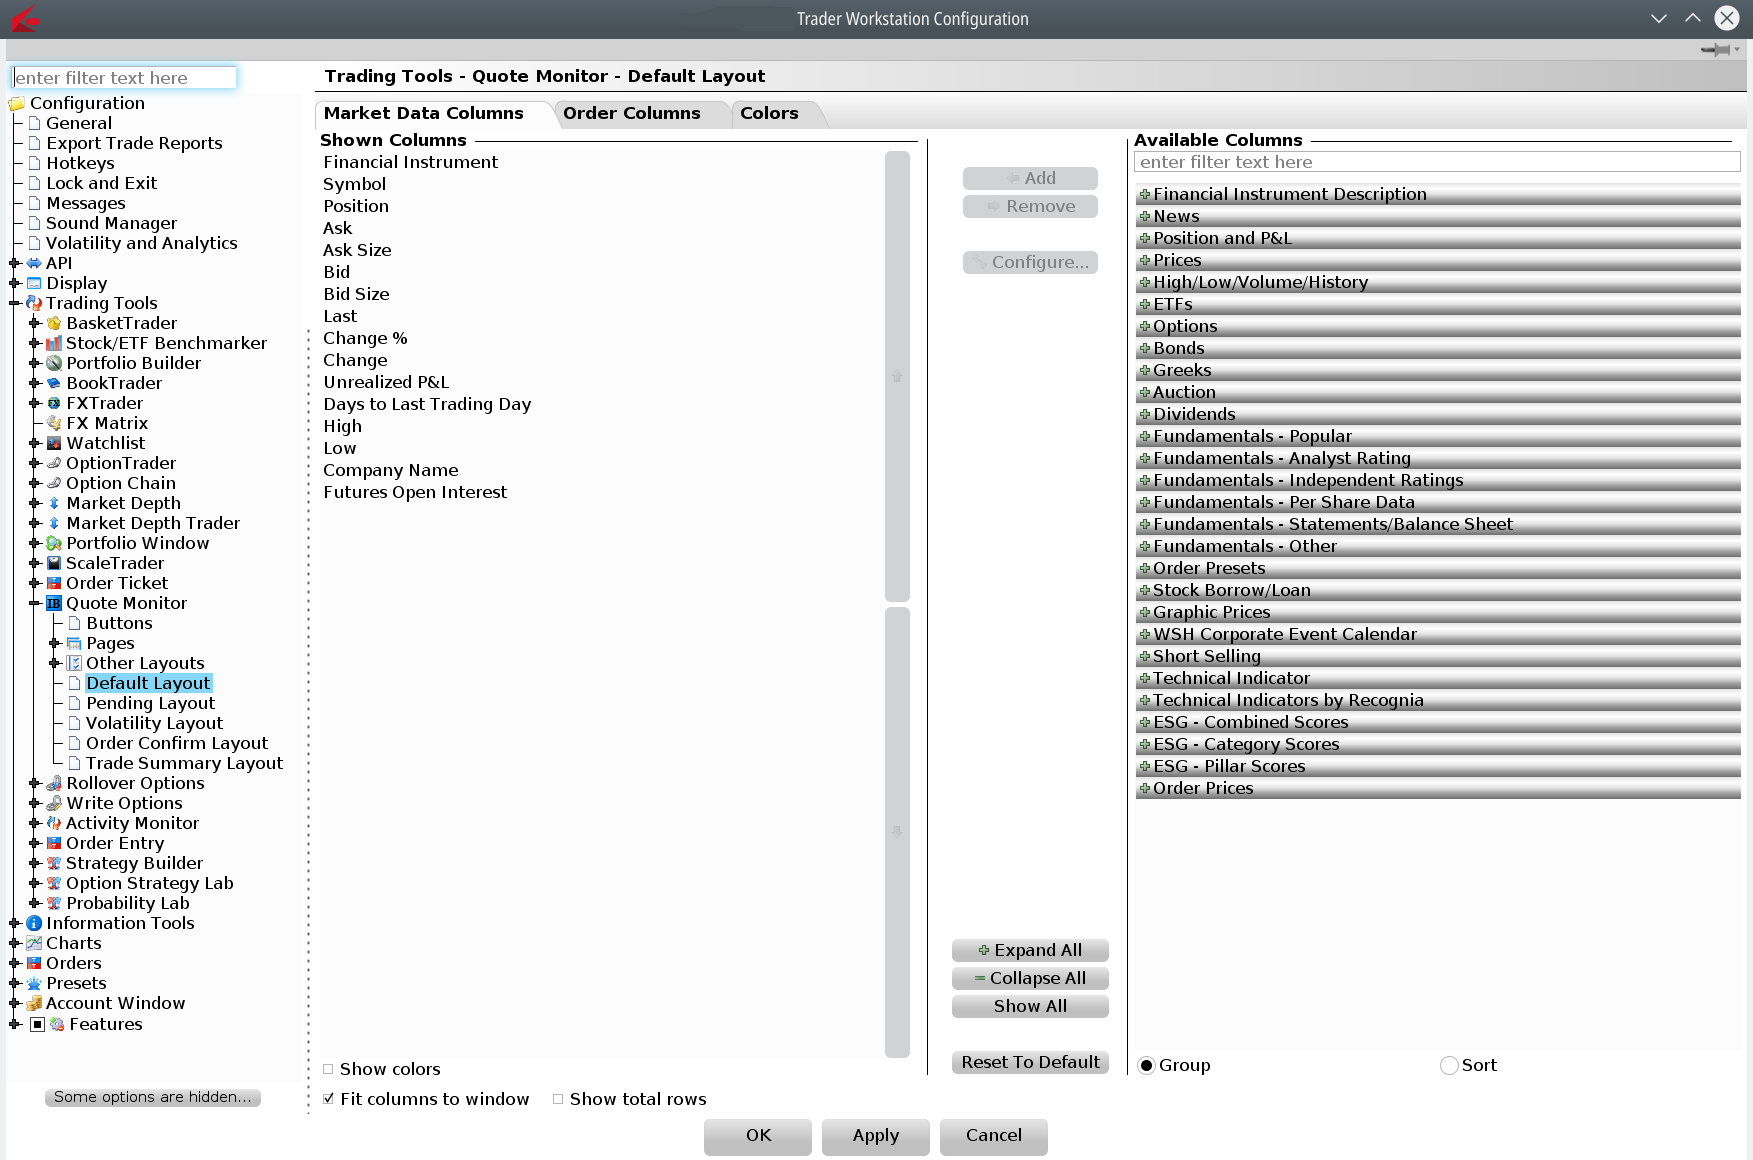
The first tab shows Market Data Columns, the second Order Columns. You can tweak these endlessly to your liking.
Next, we want to add a stop-loss and a take-profit. Right-click on the action BUY (with a blue background). A menu pops up, move the mouse cursor to Attach. Then another menu pops up. Click on Bracket Orders. This will add those two orders to the buy limit. For take-profit (LMT), I have set this to 3750.00 and stop-loss (STP) to 3685.00. These bracket orders become active of course only after the buy order is triggered, otherwise, there is no position to guard. Verify the column Key with values of 6 and then 6.2 and 6.1. It's not important to have a consecutive sequence, but the dot-separator shows which child orders are connected to which parent order. So for instance 6.2 means child order 2 is a child order to parent order 6. Again, your actual key numbers may differ.

Depending on your default settings, you may need to click on the GTC value of the stop-loss. Check that the order is allowed to trigger outside regular trading hours (RTH). Note that all orders are still in preview, nothing will happen now.
In this example, I have set the stop-loss at 3685.00, allowing a 15-point drop before the loss is cut off and the position is closed (sold) with a loss of 15 points, meaning a loss of 15 * $50,- = $750,-.
Also, take note of the column OCA Group. Both orders of the bracket share the same OCA group number (787121076). This number was made up by TWS, you can change it, but there's no need to. What is important is that they are the same for all attached OCA orders. OCA stands for One Cancels All. This means if one order of that group is triggered (and in this case closes the position) the other orders in that group are canceled. OCA allows for much more complex orders, even triggering other asset classes. Think of "If USD is below price x, buy IBM at price y.", etc.
Next, we want to automate the protection of unrealized profit, or at least reduce risk once the position is doing (very) well. This calls for a trailing stop-loss. Right-click again on the BUY action field like before. Go to Attach and pick Trailing Stop. You can set a trailing amount in points, or in percentage. In this example, I've set this to 20 points. Note how this trailing stop-loss also has the same OCA group, just how we want it. Also, check the GTC to trigger outside RTH.

So what does this situation mean? If the buy limit is triggered, we have a fixed stop-loss at 3685.00 and a trailing stop-loss of 20 points. Our maximum loss is still 15 points (not 20) because the fixed stop-loss will be hit before the trailing stop-loss. It also means if the position is up 5 points, both the fixed and trailing stop-loss are at the same level. From there on up, the trailing stop is higher than the fixed stop-loss, thus reducing our risk as the position becomes more and more profitable. If the position is up 20 points, the trailing stop-loss sits at break even, much higher than the fixed stop-loss. This way you can have a wide trailing stop-loss and still have a smaller maximum loss due to the fixed stop-loss.
Our last requirement was to make sure, the position is closed before the weekend. Depending on your time zone, the exact hour may differ. In Central European Time, this is Friday at 22:00 (=10:00 pm). In the US, this is 16:00 (=04:00 PM) Eastern Standard Time. Make sure you know the exact time, and also to which timezone your TWS is set.
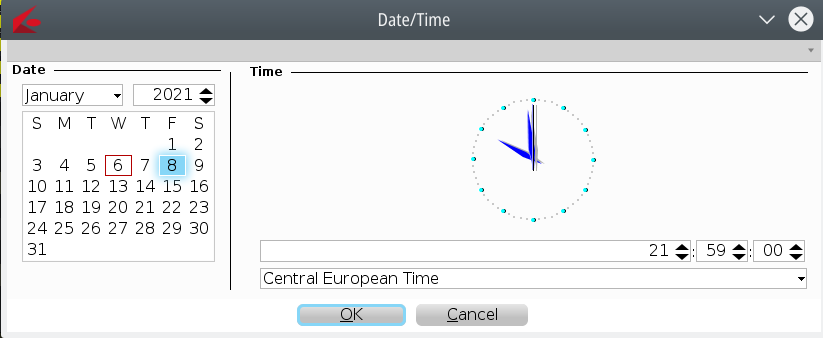
To achieve this, again right-click on the BUY action, choose Attach, and then Stop. An extra order is added to the same OCA group. Change the order type from STP (=stop-loss) to MKT (=market) and then click in the column Start time of that last added MKT order. Click on the little calendar icon. In that calendar, click on the Friday in your current week and set the time to 21:59:00 (or any other time) like this:
You could even set the time to 22:00:00 for futures, as those will trade 15 minutes past the regular close. Clearly, this depends on the type of security you're trading and its liquidity. If there's no good liquidity, executing a market order (or a stop loss, which actually turns into a market order) may cause unpredictable results!

What this order effectively does is, sell the position at market (sell to the highest bid price) starting at the moment Friday, January 8th at 21:59:00. Once that moment is reached, the order will execute instantly, closing the position and canceling all other orders in that OCA group.
If the position was already closed by one of the other OCA orders, this market order would already be canceled. So you don't end up going short one minute before the close into the weekend. One last step that needs to be done is to transmit the complete order to IB by clicking on the Transmit button ('T' in blue). TWS may show some warnings about financial risk and stop-losses in non-liquid markets. Make sure you understand those.
The final result would then look like this:

So there you have it, this advanced order does exactly what we had in mind in the third paragraph of this post, fully automated handling of a buy order and position after the fill. Before applying this yourself, make sure you understand how things work and run them in a demo account first.